[转载]Electron集成Vue
如何用 Vue 开发 Electron 桌面程序? 这篇就够了!
示例项目地址: github.com/klren0312/e…
分条查看相关积累知识: github.com/klren0312/d…
一、Electron 介绍
Electron 是一个由 GitHub 及众多贡献者组成的活跃社区共同维护的开源项目. 使用 JavaScript,HTML 和 CSS 构建跨平台的桌面应用程序
1. 特点
- 跨平台 可以打包成 Mac、Windows 和 Linux 三个平台的应用程序
- 简化桌面端开发 (1)Electron 基于 Chromium 和 Node.js,可以使用 HTML, CSS 和 JavaScript 构建应用 (2)提供 Electron api 和 NodeJS api
- 社区活跃
2. 兼容性
xp 无缘了, 可能需要使用 nwjs 等方案

二、项目搭建
1. 使用 vue cli 创建 vue 项目
vue create electron-test
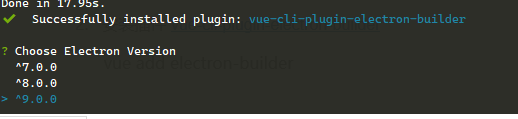
2. 安装插件 vue-cli-plugin-electron-builder
vue add electron-builder
3. 安装完插件后, 项目中的一些变化
① package.json 新增了几个 scripts
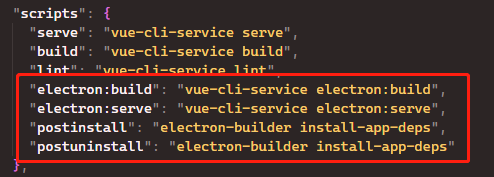
npm run electron:serve  electron开发模式
npm run electron:build   electron打包
postinstall 和 postuninstall 是为了确保安装或者移除依赖时, 始终跟 electron 匹配
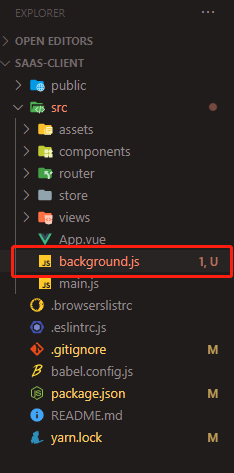
② 新增了 background.js 文件
主进程相关操作, 写在这个文件中
③ 新增了一个环境变量
可以用来判断是否在 electron 状态
process.env.IS_ELECTRON
三、开发总结
1. 配置项目图标
使用electron-icon-builder, 生成符合 Electron 的图标
① 安装
npm install --save-dev electron-icon-builder
② package.json 中配置生成命令
"electron:generate-icons": "electron-icon-builder --input=./public/icon.png --output=build --flatten"
③ 生成图标
npm run electron:generate-icons
④ 使用
import path from "path";
const win = new BrowserWindow({
    icon: path.join(__static, "icon.png"),
});
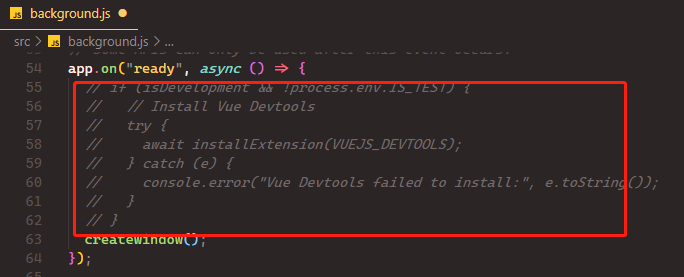
2. 项目开发模式运行出现 Failed to fetch extension 警告
由于网络问题, 开发模式无法下载 vue devtool 导致的警告, 需要在 background.js 中注释掉下载代码
3. 项目使用本地的 vue devtools
① 首先可以将 vue devtools 的代码 clone 下来, 然后进行编译
git clone https://github.com/vuejs/vue-devtools.git
cd vue-devtools
npm install
npm run build
然后把vue-devtools/packages/shell-chrome文件夹复制到项目根目录
② 在background.js文件的app.on('ready',生命周期中进行加载
// 使用本地的vue开发者工具
session.defaultSession.loadExtension(path.resolve("shell-chrome"));
③ 创建窗口的时候使用下面示例方法, 即可正常显示出 vue 开发者工具
// src/background.js
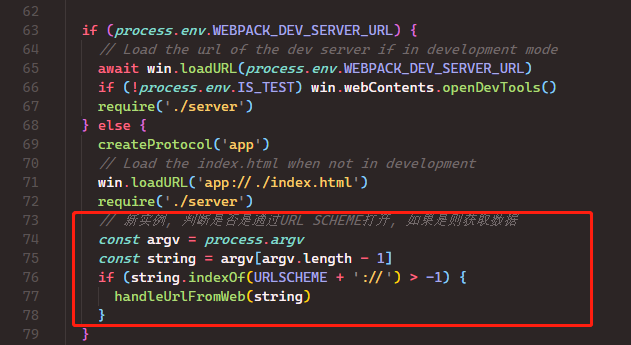
if (process.env.WEBPACK_DEV_SERVER_URL) {
await transferWin.loadURL(process.env.WEBPACK_DEV_SERVER_URL + "/#/test");
if (!process.env.IS_TEST) transferWin.webContents.openDevTools();
} else {
transferWin.loadURL("app://./index.html" + "/#/test");
}
4. 渲染进程中如何使用 NodeJS api
需要在 vue.config.js 中配置 nodeIntegration 为 true
module.exports = {
    pluginOptions: {
        electronBuilder: {
            nodeIntegration: true,
        },
    },
};
或者在创建窗口时配置
win = new BrowserWindow({
    width: 500,
    height: 400,
    frame: false,
    transparent: true,
    backgroundColor: "#00000000", // 当关闭开发者工具时, 会重新创建一个新的渲染视图, 所以会使用配置的背景颜色, 如果没配置会使用默认值白色
    webPreferences: {
        nodeIntegration: true, // 渲染层可以使用node
        webSecurity: false, // 跨域
        enableRemoteModule: true, // 可以使用remote
    },
    // eslint-disable-next-line no-undef
    icon: path.resolve(__static, "logo.png"),
});
5. 让创建的窗口可以跨域
创建窗口的时候配置 webSecurity: false即可
6. 如何监听窗口的状态, 最小化, 聚焦, 窗口隐藏, 窗口显示, 窗口关闭
// 窗口最小化触发
win.on("minimize", () => {
    console.log("最小化");
});
win.on("focus", () => {
    console.log("聚焦");
});
// 窗口隐藏, 任务栏没有图标
win.on("hide", () => {
    console.log("隐藏");
});
win.on("show", () => {
    flashTray(false);
    console.log("显示");
});
7. 如何创建托盘图标
let tray = null
function createTray () {
  tray = new Tray(path.resolve(__static, ‘logo.png’)) // 设置托盘图标
  const contextMenu = Menu.buildFromTemplate([
     new MenuItem({
      label: '退出程序',
      click: () => {
        isQuit = true
        app.exit()
      }
    })
  ])
  tray.setContextMenu(contextMenu) // 设置右键菜单
  tray.on(‘click’, () => { // 托盘点击事件
    if (win.isVisible()) {
      win.focus()
    } else {
      win.show()
    }
  })
}
监听主窗口的关闭, 如果不是完全退出, 则只是隐藏窗口
win.on("close", (e) => {
    if (isQuit) {
        win = null;
    } else {
        e.preventDefault();
        win.hide();
    }
});
8. 托盘闪烁与任务栏闪烁

① 托盘闪烁原理就时定时的切换托盘的图标, 图标与透明图标的切换
let flashInterval;
function flashTray(bool) {
    if (!bool) {
        flashInterval && clearInterval(flashInterval);
        tray.setImage(path.resolve(__static, "logo.png"));
        return;
    }
    flashInterval && clearInterval(flashInterval);
    var count = 0;
    flashInterval = setInterval(function () {
        if (count++ % 2 == 0) {
            tray.setImage(path.resolve(__static, "empty.png"));
        } else {
            tray.setImage(path.resolve(__static, "logo.png"));
        }
    }, 400);
}
② 任务栏的闪烁
win.flashFrame(true); // 高亮
9. 如何只运行单个实例
如果你的程序是应用的主要实例并且当 app.requestSingleInstanceLock()返回 true 时,你应该继续让你的程序运行。如果当它返回 false, 那就立即退出
const gotTheLock = app.requestSingleInstanceLock();
if (!gotTheLock) {
    app.quit();
}
{
    app.on("second-instance", (event, argv) => {
        if (process.platform === "win32") {
            if (win) {
                if (win.isMinimized()) {
                    win.restore();
                }
                if (win.isVisible()) {
                    win.focus();
                } else {
                    win.show();
                }
            }
        }
    });
}
10. 主进程与渲染进程如何通信
参考文档:
ipcMain ipcRenderer
① 渲染进程
const {ipcRenderer} = require('electron')
ipcRenderer.send('message', 'ping') // 发送给主进程
ipcRenderer.on('message-reply', (event, arg) => {
  console.log(arg) // pong
}
② 主进程
// 监听渲染进程信息
ipcMain.on("message", (event, arg) => {
    console.log("ping");
    event.sender.send("message-reply", "pong"); // 回复子程序
});
// 主进程单独往渲染进程发信息
win.webContents.send("message-reply", "pong");
11. 打包问题
使用 nsis 打包 windows 程序的安装包 在 vue.config.js 中配置打包配置
module.exports = {
    pluginOptions: {
        electronBuilder: {
            builderOptions: {
                win: {
                    target: [{ target: "nsis", arch: ["ia32", "x64"] }],
                },
                nsis: {
                    oneClick: false, // 一键安装
                    perMachine: true, // 为所有用户安装
                    allowElevation: true, // 允许权限提升, 设置 false 的话需要重新允许安装程序
                    allowToChangeInstallationDirectory: true, // 允许更改安装目录
                    createDesktopShortcut: true, // 创建桌面图标
                    createStartMenuShortcut: true, // 创建开始菜单
                    deleteAppDataOnUninstall: true,
                    include: "./public/nsis/installer.nsh", // 包含的脚本
                    guid: "53fe4cba-120d-4851-3cdc-dccb3a469019", // 软件guid
                },
            },
        },
    },
};
12. 从网页打开程序
① 主进程注册
app.removeAsDefaultProtocolClient(‘testapp’)
app.setAsDefaultProtocolClient(‘testapp’)
② 在 nsis 打包配置文件(installer.nsh)中添加配置 在安装的时候在注册表注册 URL protocol
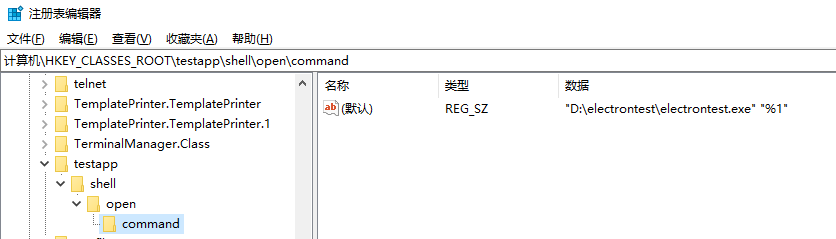
!macro customInstall
  DetailPrint 'Register testapp URI Handler'
  DeleteRegKey HKCR 'testapp'
  WriteRegStr HKCR 'testapp' '' 'URL:testapp'
  WriteRegStr HKCR 'testapp' 'URL Protocol' ''
  WriteRegStr HKCR 'testapp\shell' '' ''
  WriteRegStr HKCR 'testapp\shell\Open' '' ''
  WriteRegStr HKCR 'testapp\shell\Open\command' '' '$INSTDIR\${APP_EXECUTABLE_FILENAME} %1'
!macroend
③ 直接在浏览器访问链接即可触发打开客户端 testapp://?参数=值

④ 获取网页端传来的参数
// window 系统中执行网页调起应用时,处理协议传入的参数
const handleArgvFromWeb = (argv) => {
    console.log(argv);
    const url = argv.find((v) => v.indexOf(`${URLSCHEME}://`) !== -1);
    console.log(url);
    if (url) handleUrlFromWeb(url);
};
// 进行处理网页传来 url 参数,参数自定义,以下为示例
// 示例调起应用的 url 为 testapp://?token=205bdf49hc97ch4146h8124h8281a81fdcdb
const handleUrlFromWeb = (urlStr) => {
    console.log(urlStr);
    const urlObj = new URL(urlStr);
    const { searchParams } = urlObj;
    const token = searchParams.get("token");
    console.log(token);
};
可以看到获取的参数是个数组, 我们就时要获取最后一项
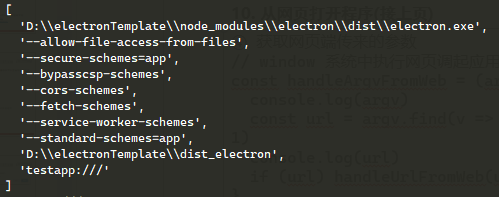
生产模式下, 如果软件没有提前打开, 通过网页开启时, 需要按照下图方式来获取参数
若提前开启, 则在判断单例的条件判断中获取

13. 安装依赖或打包时出现 electron 包下载过慢问题
根目录创建 .npmrc 文件
registry = https://registry.npm.taobao.org

sass_binary_site = https://npm.taobao.org/mirrors/node-sass/
phantomjs_cdnurl = http://cnpmjs.org/downloads
electron_mirror = https://npm.taobao.org/mirrors/electron/
sqlite3_binary_host_mirror = https://foxgis.oss-cn-shanghai.aliyuncs.com/
profiler_binary_host_mirror = https://npm.taobao.org/mirrors/node-inspector/
chromedriver_cdnurl = https://cdn.npm.taobao.org/dist/chromedriver
14. 通过外面浏览器打开链接
const { shell } = require("electron");
shell.openExternal("https://www.bing.com");
15. 开发模式如果打开窗口时, 若开启了开发者工具, 想关闭窗口, 需要先把开发者工具关闭, 才能正常关闭窗口
在窗口关闭前, 判断开发者工具是否开启, 若开启则先关闭开发者工具, 例如
if (callWin.isDevToolsOpened()) {
    callWin.closeDevTools();
}
16. 透明无边框窗口, 接触到屏幕边缘会出现黑色边框问题
参考资料: github.com/electron/el…
主要就是创建窗口时添加延时,
setTimeout(() => createWindow(), 400);
然后关闭硬件加速
app.disableHardwareAcceleration();
app.commandLine.appendSwitch("disable-gpu");
app.commandLine.appendSwitch("disable-software-rasterizer");
17. 透明无边框窗口, 当关闭开发者工具时, 背景会变白色问题
参考资料: github.com/electron/el…
当关闭开发者工具时, 会重新创建一个新的渲染视图, 所以会使用配置的背景颜色, 如果没配置会使用默认值白色 所以需要在窗口创建时设置backgroundColor属性为#00000000
18. 渲染进程获取主进程环境变量
const { remote } = require("electron");
const envData = remote.getGlobal("process").env;
19. 打包时, 报错 asar 文件被占用
vscode 可以再 setting.json 里配置忽略 dist_electron 文件夹
"files.exclude": {
  "dist_electron": true,
}
20. 软件更新
使用electron-updater
① 配置vue.config.js 设置publish配置, 配置了这个配置后, 打包后会生成一个latest.yml文件, 需要将其和安装包放在服务器同一目录下, url配置成服务器可以访问到这个目录的 url, 也可以使用autoUpdater.setFeedURL(url)动态配置 url
pluginOptions: {
    electronBuilder: {
        builderOptions: {
            publish: [
                {
                    provider: "generic",
                    url: "http://127.0.0.1:5000",
                },
            ];
        }
    }
}
② 类似示例 [github.com/electron-us…](https://github.com/electron-userland/electron-builder/blob/docs/encapsulated manual update via menu.js)
21. electron win7 问题
① win7 sp1 or win8 needed install KB4019990 patch to resolve this issue for now(note:none sp1 win7 needed to upgrade to sp1 before install the patch) 需要安装补丁解决黑屏问题 github.com/electron/el…
② 升级.net github.com/electron/el…
③ 关闭硬件加速 github.com/electron/el…
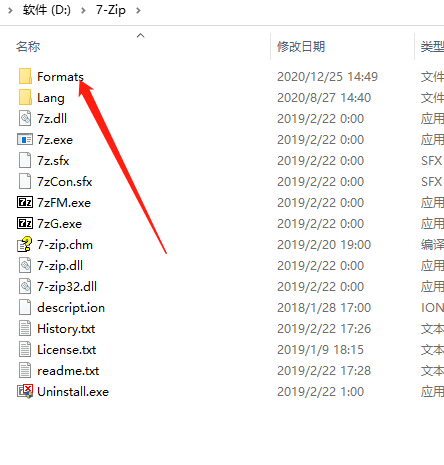
22. 7z 解压 asar 插件
目前我用 asar 命令行解压会报错, 但是用 7z 的插件虽然报错, 却可以完整解压 插件地址: www.tc4shell.com/en/7zip/asa…
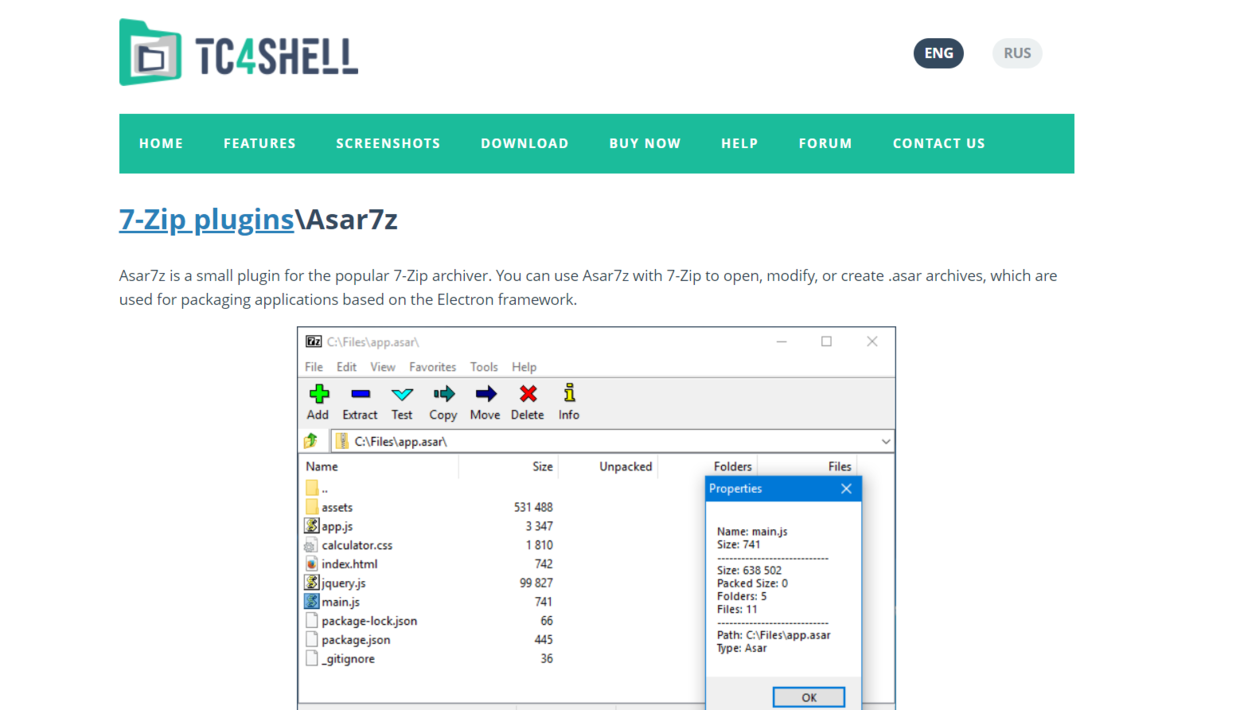
下载好, 把 dll 复制到 7z 安装目录下新建一个Formats文件夹中